We may use Pro Tools for our editing, mixing, and mastering; but that doesn’t mean we can only work with people who use Pro Tools. What matters is the Audio. A lot of producers are using Logic and Ableton to put their music together. Since what is important is the audio, we want to show you Logic users how you can get your audio out of that project to send off to us.
Audio Tracks & Audio Regions
When working in Logic, you may have caught on that we have audio tracks and audio regions. An audio track can contain multiple audio regions but an audio region is a single segment of audio. Regions get played on the audio track they are located and are raw audio.
Think of your track as your channel strip on a console, the audio source is manipulated as it runs through this. It is important to know the difference when working in DAWs (Digital Audio Workstations) because you may want to export the audio in its raw form, or you may want to export the audio with the sound you have crafted for it using plugins such as reverb or EQ. You might even want to keep all the plugin settings but update the audio region, or a piece of it, being played through that track to keep the sound you worked for on a better take.
In this tutorial we will show you how to export your audio both with or without your plugins when using Logic. Lets talk about these two options a bit more and how to go about doing both.
Exporting The Audio Region In Logic Pro X
You might be asking yourself why you would want to export just the region and not the track itself. You may have been applying plugins through the creative process or making your own rough mix to send another engineer or producer you work with. But then you’re going to want to get that song mixed and mastered. In most cases, we prefer that you send us raw audio for mixing and mastering without any plugins on them- most engineers will; it gives us more control. So the way to go about doing this would be to export the regions and not the track.
- First lets get a session open with some audio files in it
Keep in mind that if you have multiple regions on the track that need to be exported as one, you will need to consolidate them before selecting to export. In Logic this is referred to as ‘Joining.’
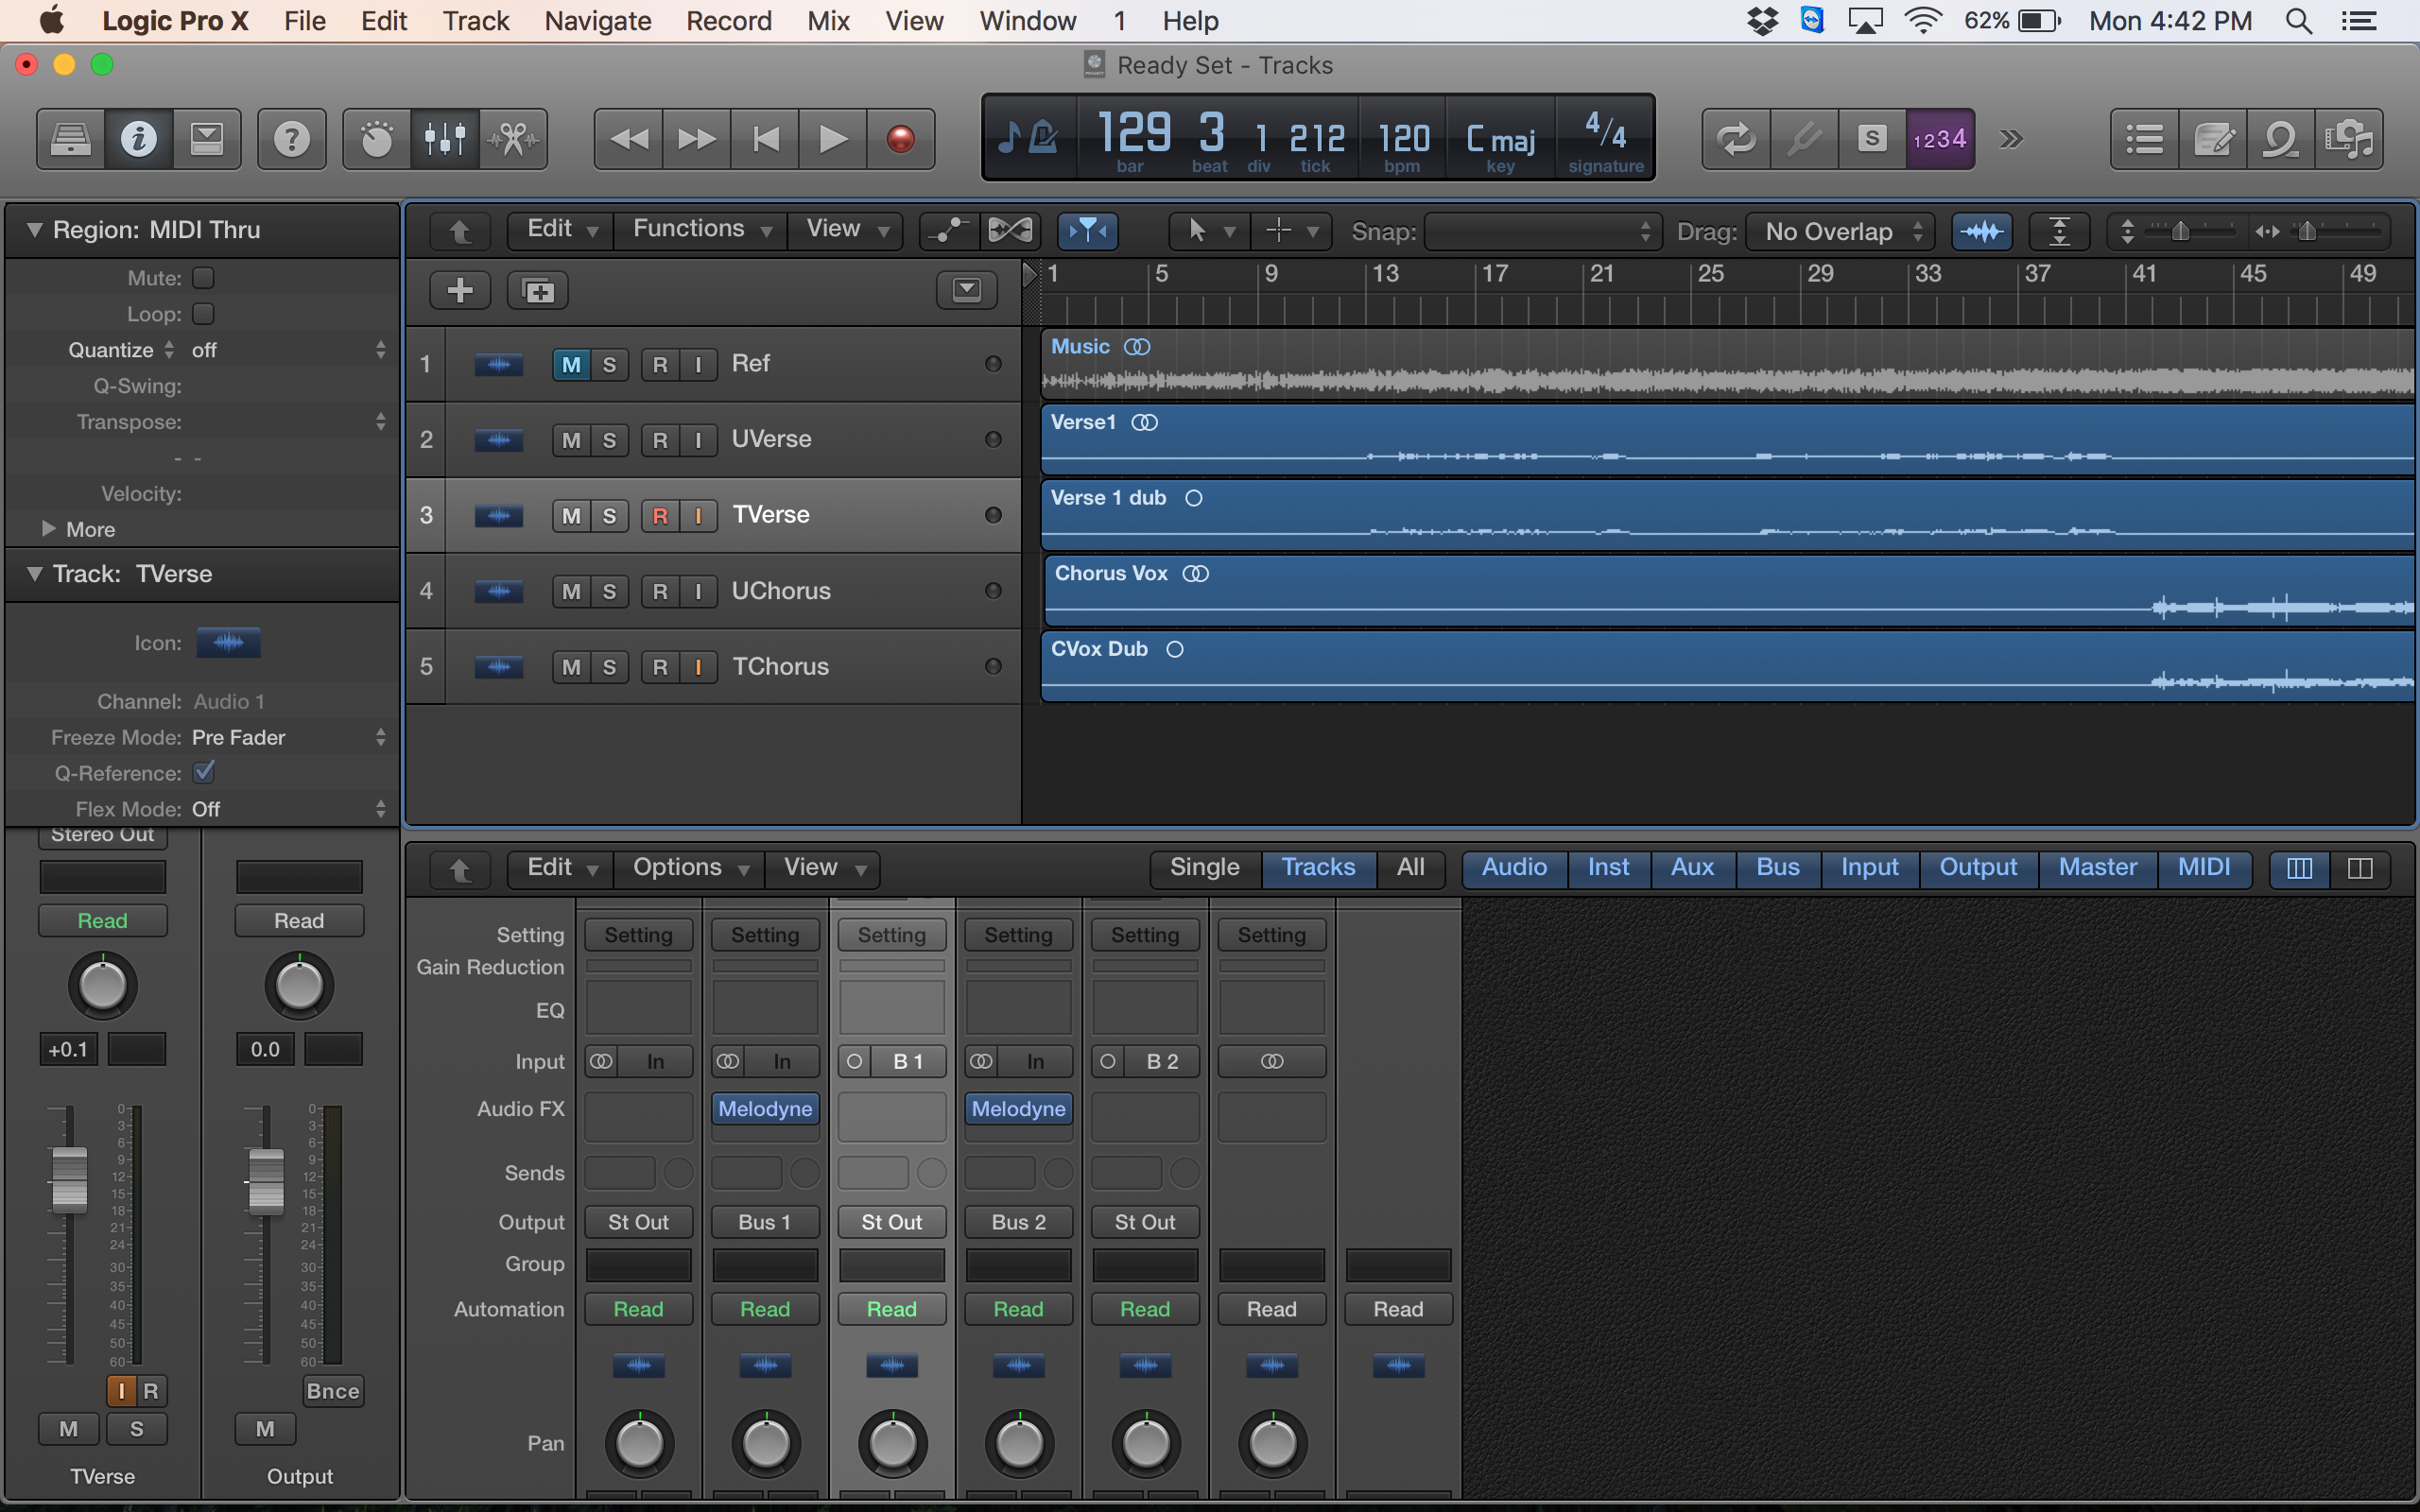
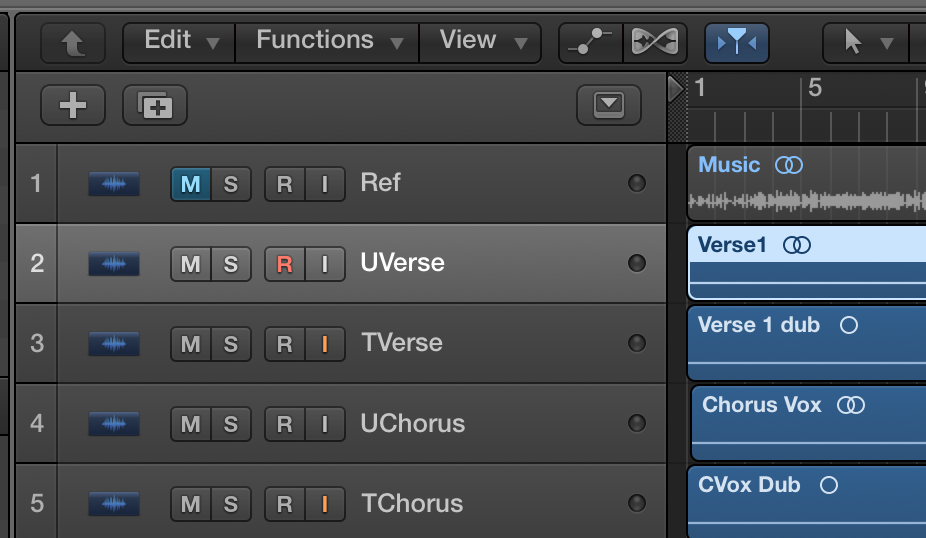
- Look at the track selected in the image below. Notice how it has three regions in it.

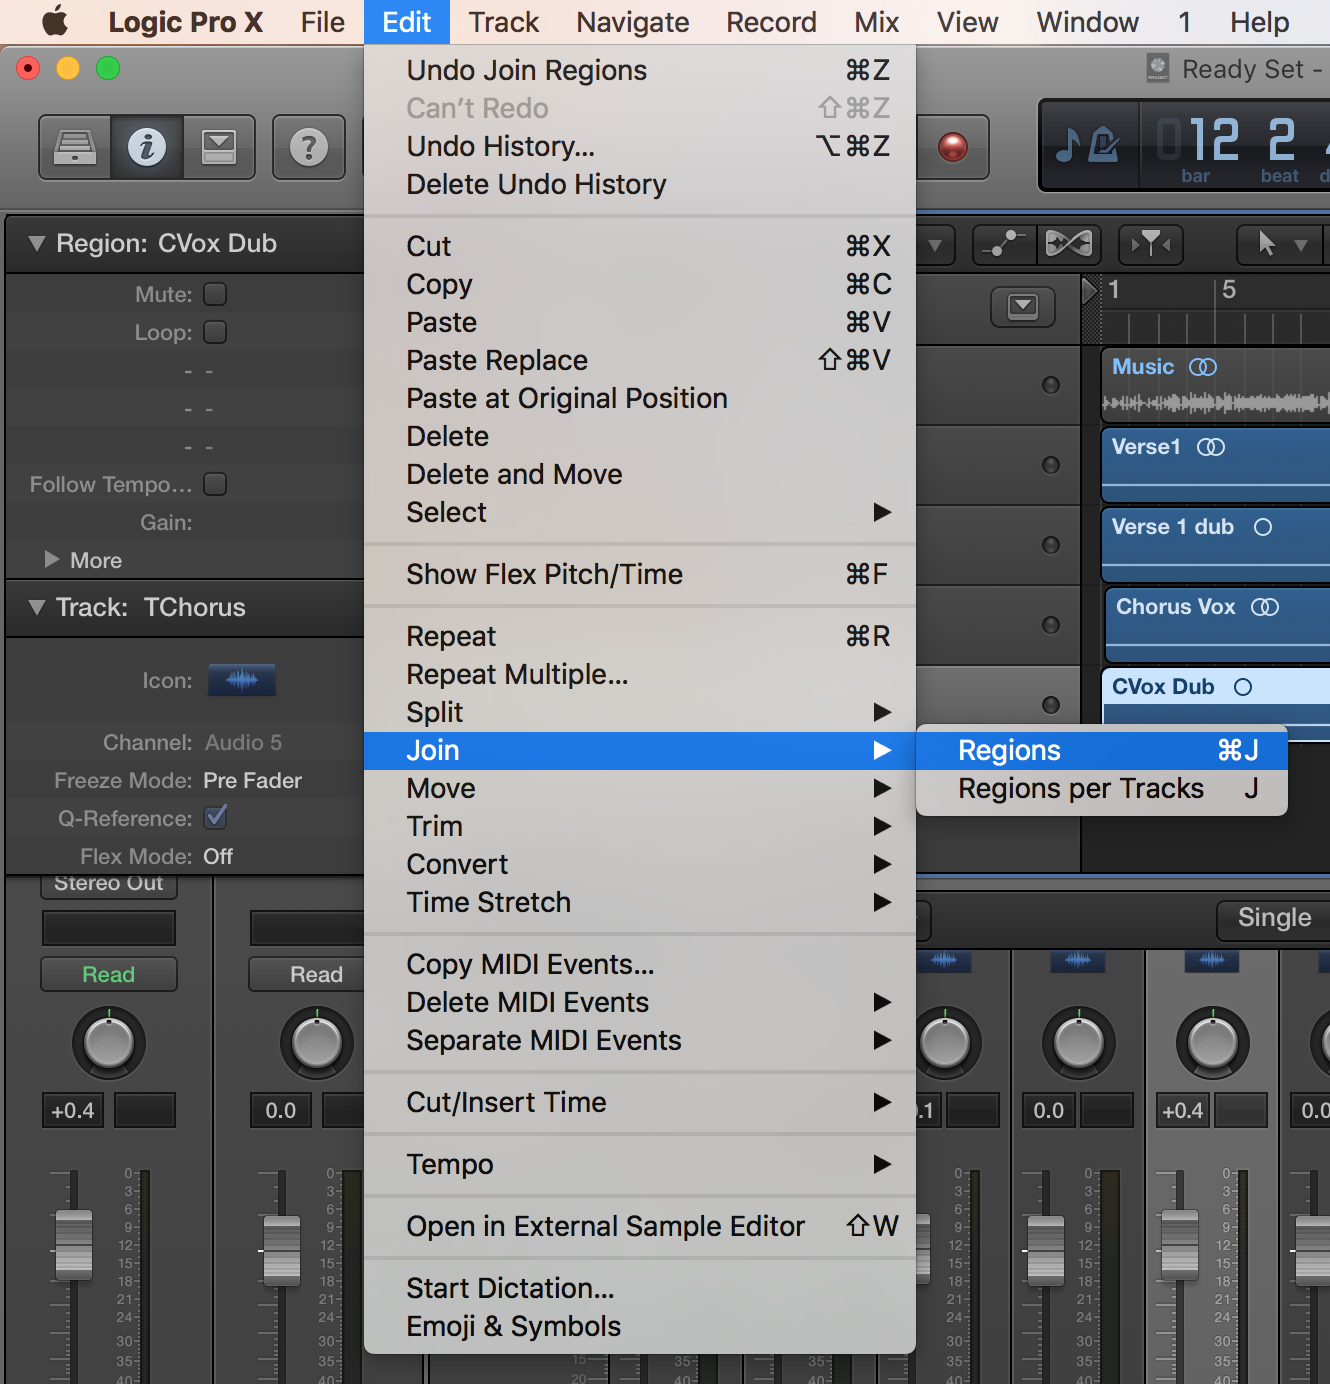
- If I am going to export them as one to send to a mixing engineer, I am going to need to join them together as one region. You can do this by selecting all the regions, going to Edit > Join > Regions as you can see below; or you can just press Command + J on your keypad.
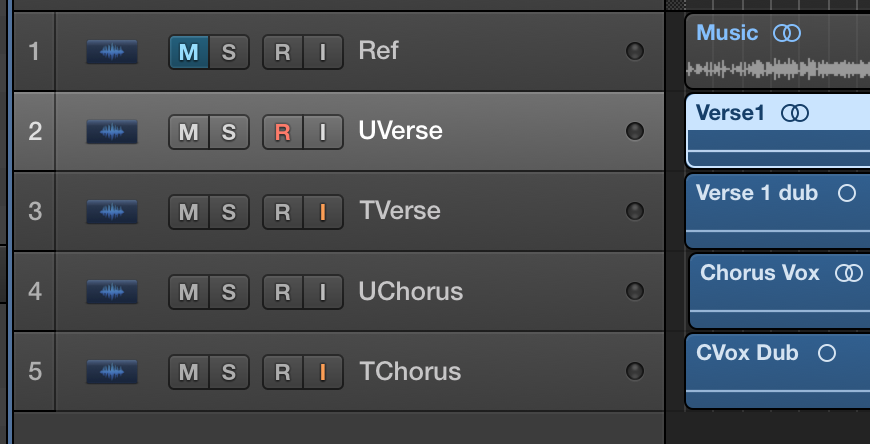
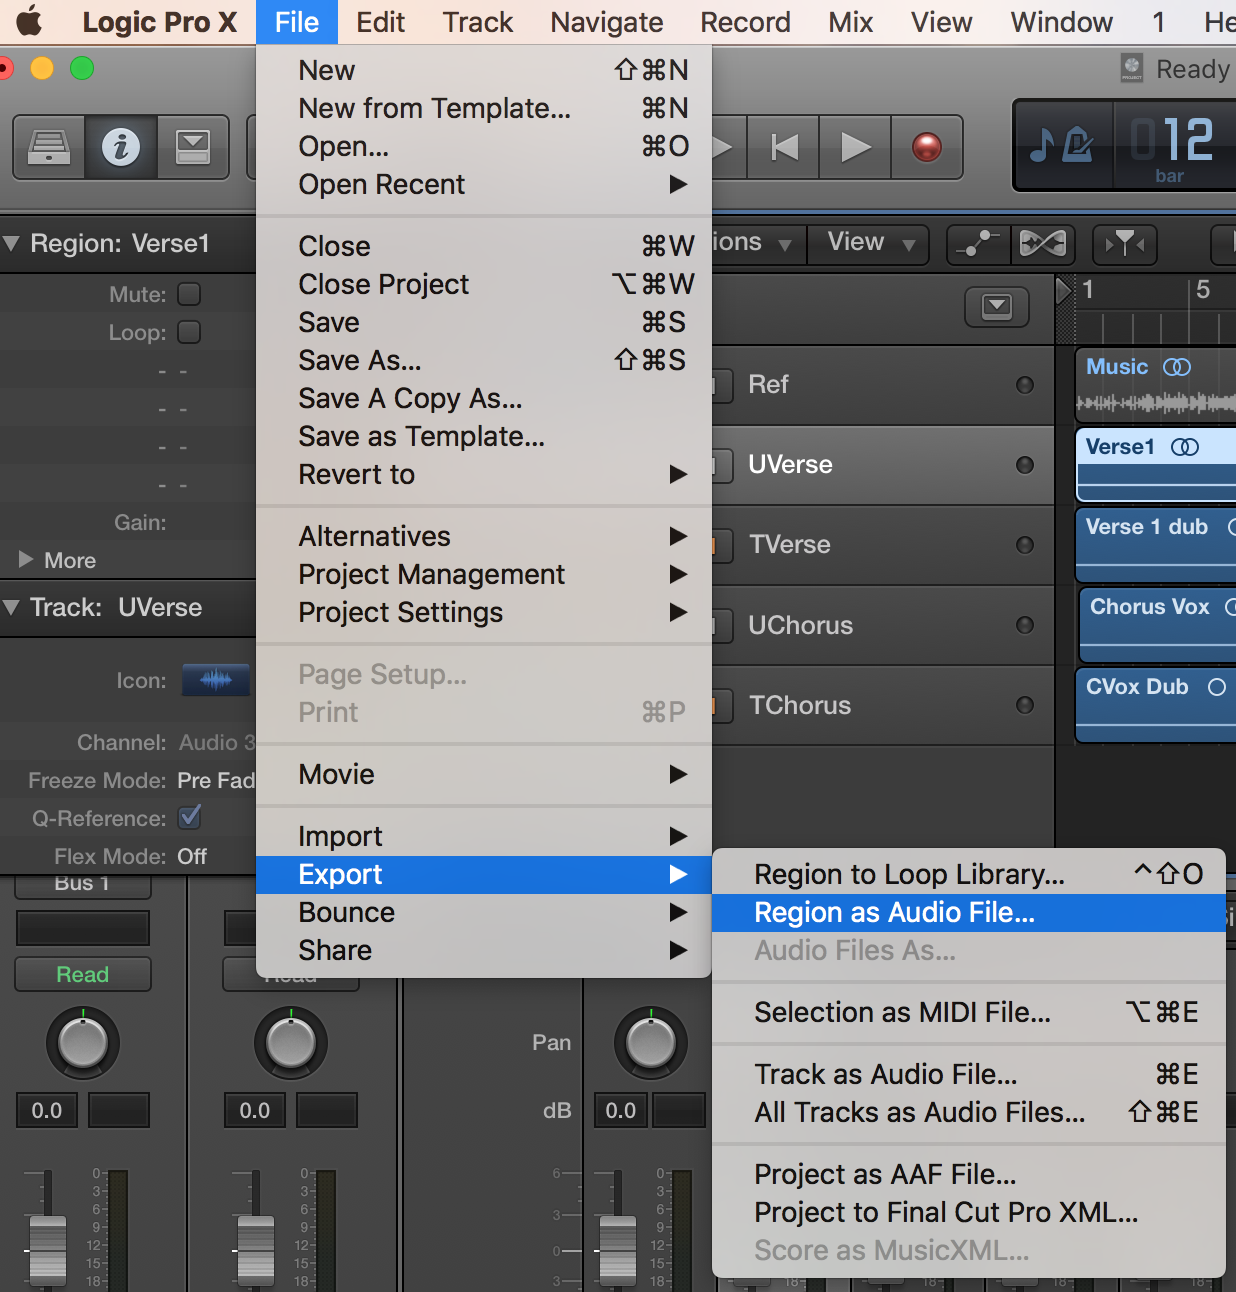
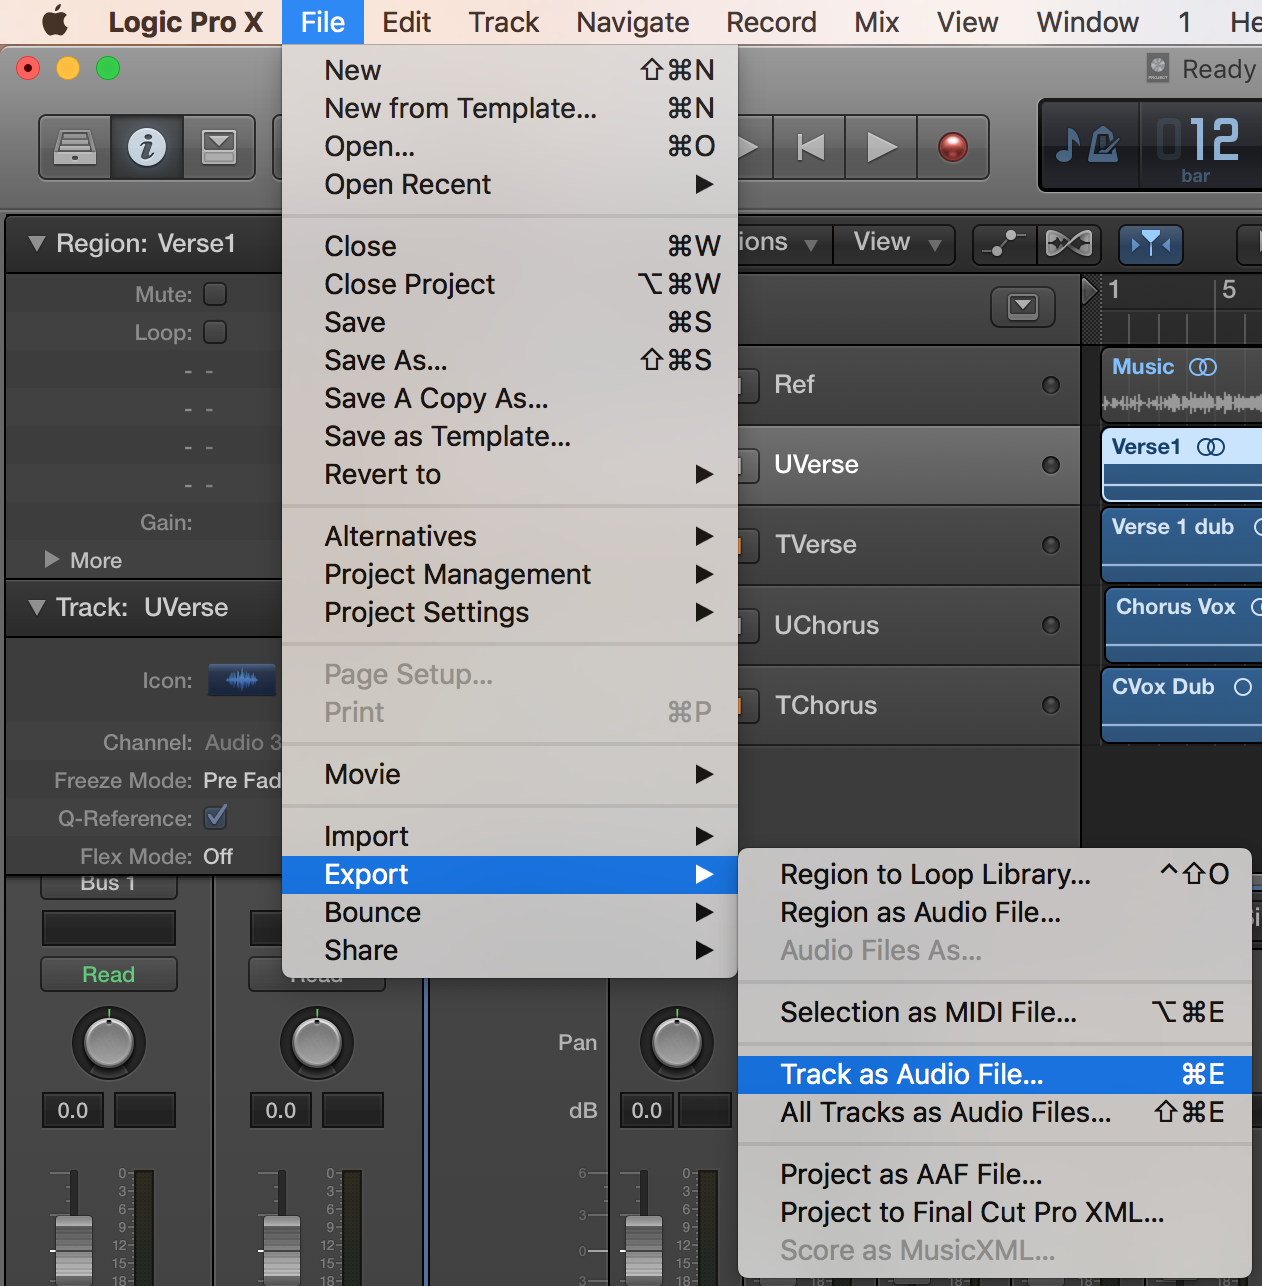
- With all the regions on each track joined, click the first region you want to export so it is highlighted like you see I have the region “Verse1” selected below.
- Now with the region selected go to File > Export > Region As Audio File.
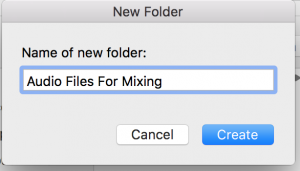
- If you haven’t already, it is smart to make a folder to put all these files in to be sent off. This is keeps things organized and these files can be anywhere as the session/project is not using them to run; they’re copies of the region exported from the project. Make it something obvious like you see below.
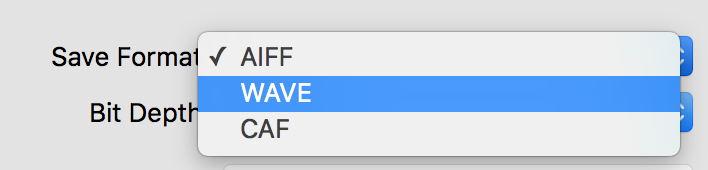
- By default, the format of the audio might be set to AFF, you are going to want to change that to WAV as it is a more universal audio format being used across multiple operating systems and DAWs.
Now you just need to repeat all these steps until you have all the audio files exported to be sent off and you’re all set. Now let’s go over another way to export your audio.
Exporting Audio Tracks In Logic Pro X
Now that we made so much sense out of exporting the regions, let’s talk about exporting the track. If you export the track, it will print an audio file that has all the active plugins on it. So if you have a reverb on a track and export the track, the audio file you export will have that reverb printed to it. Now, you will want to do this in two scenarios.
First scenario: You have achieved a unique sound with a plugin that you do not want the engineer to change in the mix. This might be an digital amp or guitar rig sound, maybe a processor on a vocal, or even just a great reverb that you do not want removed from your snare. Either way, if you need to keep the sound you made with the audio, export the audio track.
Second scenario: You are a mixing engineer who does mixing using Logic. When you finish your mix you want to print the final stems to provide the artist with a full session stem. You are going to want to print the audio with all the EQs, compressors, and instrument sound effects printed to it. Use export audio track to keep your sound and still share the audio files with the artists.
- First thing to do is select the track you want to export. Make sure you have the track selected and not just the region. If you click a track, it will select the regions in that track, but if you select a region on another track, it will not select the track for the region you selected. Because of this, you can export the wrong track by trying to do this through selecting the region.
With the proper track selected go to File > Export > Track as Audio File or press Command + E.
Just like we went over earlier, it is smart to make a designated folder for these exported audio files to be sent to. Do this for the rest of the tracks you want to include and you are all set. Thanks for checking out our How To and if you found this helpful, you might enjoy this tutorial on how to export your files from Pro Tools. You will be able to bring these audio files into Logic for you to use if you have a collaborator who uses Pro Tools.