So I had a good friend call me up the other day about an issue he was having. He was wondering why after he was done with his session, he would remove the unused audio files and pro tools would delete some of his samples in his sample library. The idea when importing audio files through “Import Audio” in pro tools, is that it would COPY over the audio file into your session folder. But in his case, it wasn’t copying them over. If he moved his session to another computer, he would get the “Cannot find audio” error we all hate. We’ll, there is a solution for this. It’s not completely apparent, but after a couple sessions of files getting deleted and missing audio files from sessions, one tends to quickly find a solution.
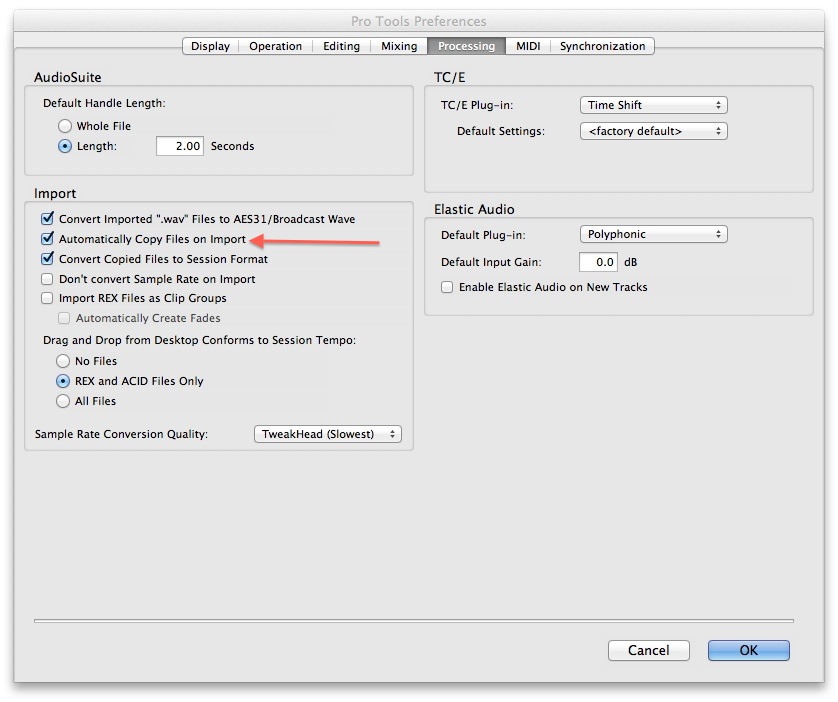
The fix lies within Pro Tools Preferences.
1. (On Mac) Click on “Pro Tools” at the top of your screen and go to Preferences.
2. Go to the Processing tab and check “Automatically Copy Files on Import”

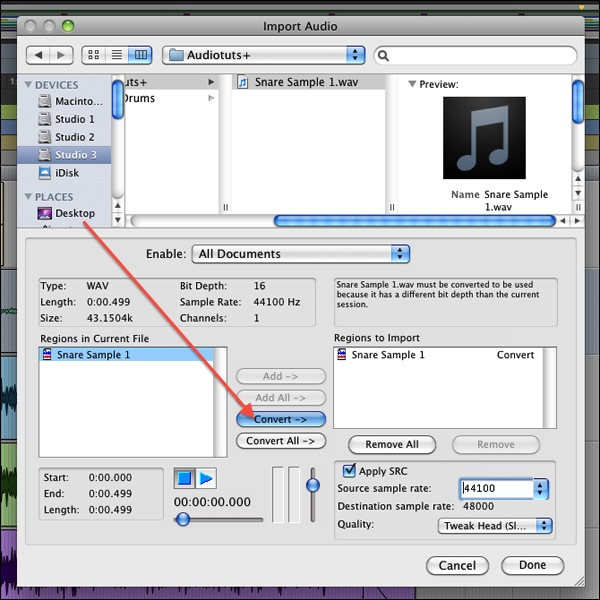
3. This 3rd step should automatically be covered because of the option chosen in the processing tab. But this is another step to take to ensure you are properly copying the files over. In the Import Audio window, always make sure to click on “Copy” or “Convert” instead of “Add”. Because when you click on “Add” you are telling Pro Tools to leave the file in it’s location, instead of Copying it to your session folder.

