If you’re a musician or producer making music in Pro Tools, being familiar with MIDI opens up a world of possibilities for you. We will go over some MIDI functions and setups in another tutorial, this blog will assume you know how to record MIDI with your virtual instruments and controllers.
When you’re finished tracking, you should not try to send the MIDI tracks to an engineer for mixing. Save them in case you need to make some changes later on. When you send the song to somebody else with their own setup, you should not assume they will have the same virtual instruments and plugins you used to make those MIDI performances.
So now that you have that MIDI ready to be mixed, let’s learn how to convert it to Audio.
Technically we aren’t converting MIDI into audio. We need to record the MIDI performance to audio. To do this we will first need to create a new audio track.
- Go to the Track Menu and select ‘create new track.’ You can also press Shift + Command + N to bring up the new track prompt.
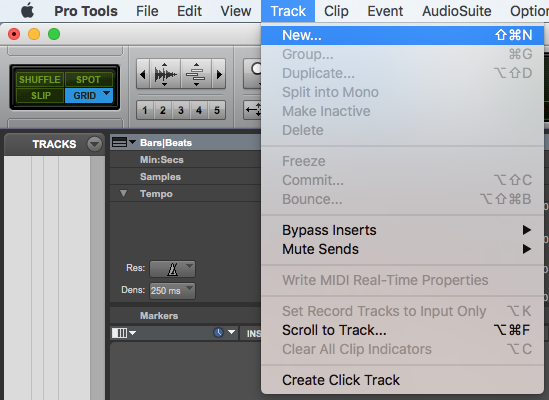
- Depending on what you are recording, choose mono or stereo track. In this tutorial we will create stereo tracks.

With your audio track created, you need to route the signal of the MIDI track to your audio track. We will use the bus routing system inside Pro Tools to do this. A tutorial that explains more about Pro Tools’ I/O setup is on the way.
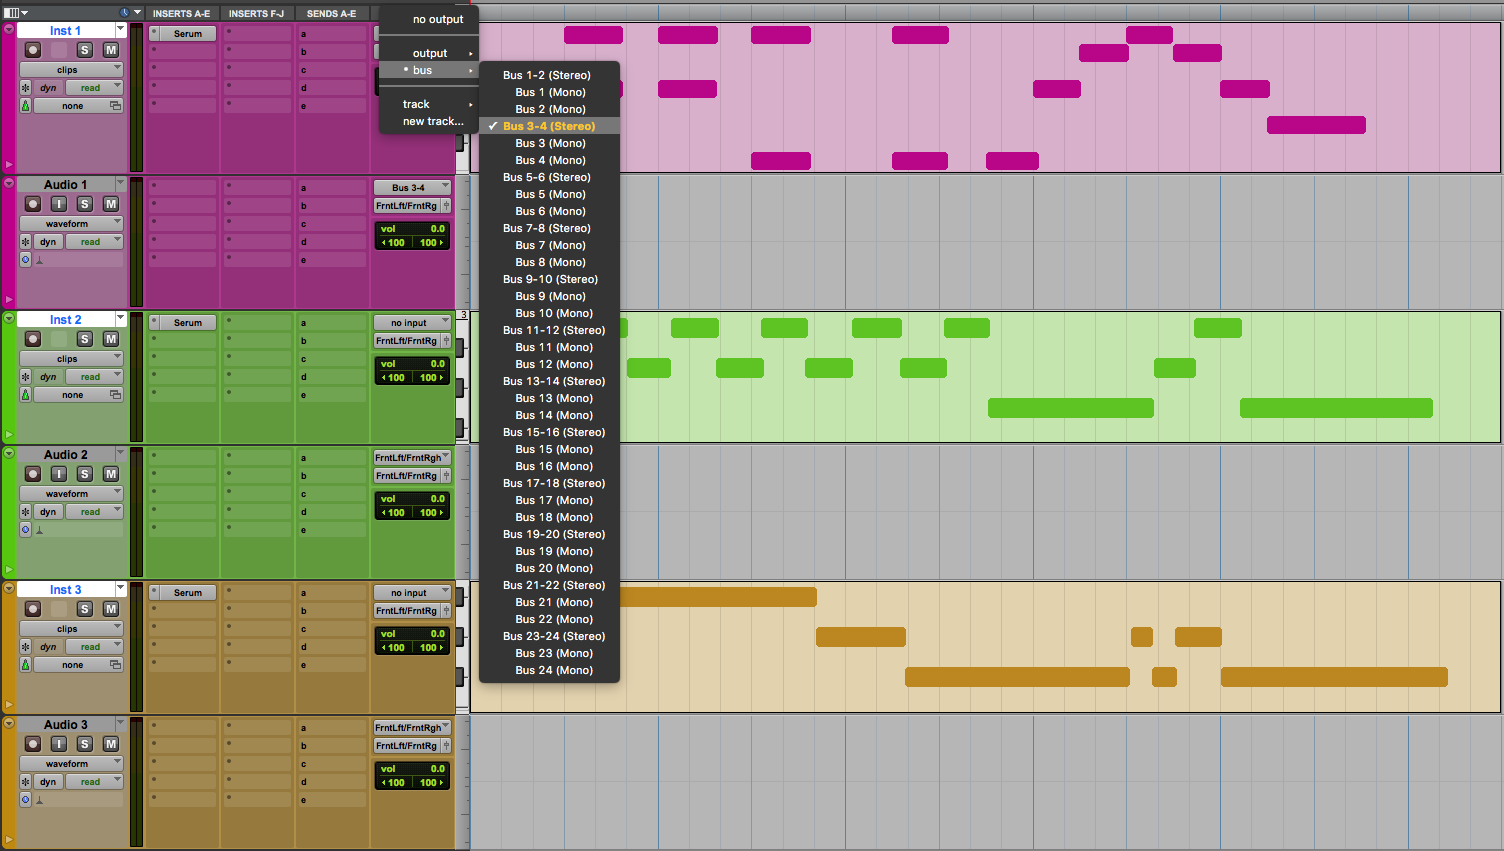
- Go to the output of your MIDI track and notice that you have an option to select from a list of busses; Select bus 3-4
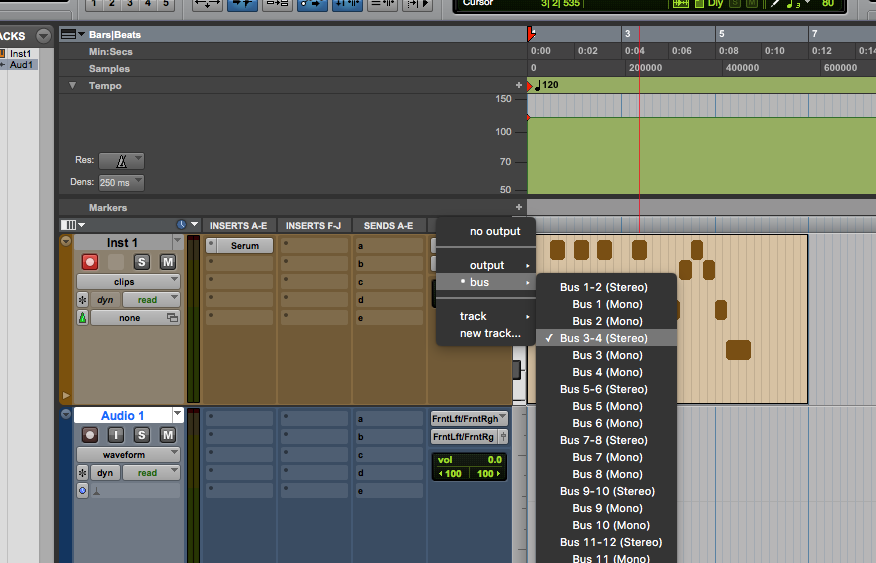
The audio triggered by your MIDI is no longer being sent directly to your session’s master buss; it is on bus 3-4, but is being sent nowhere yet.
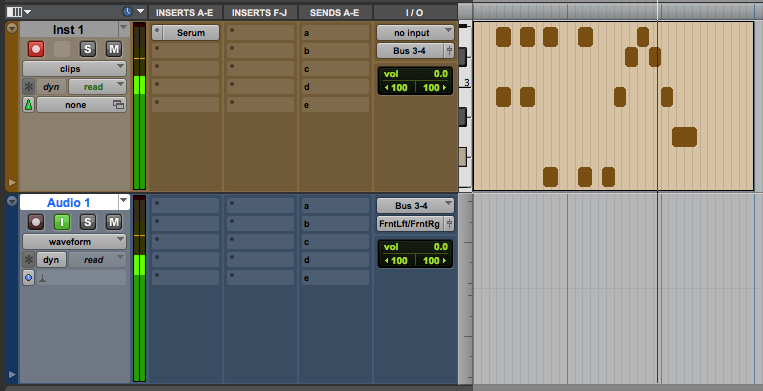
Now we will need to get that signal to the audio track.
- Go to the input of your audio track and change it to bus 3-4, the same as the output of the MIDI track.

If you enable input monitor on the audio track and press play, you should hear the audio signal of the MIDI track. The volume of the MIDI track can be adjusted if the signal is too weak or too hot. The MIDI’s signal is back to the master bus, but now it passes through the audio track we made to get there.
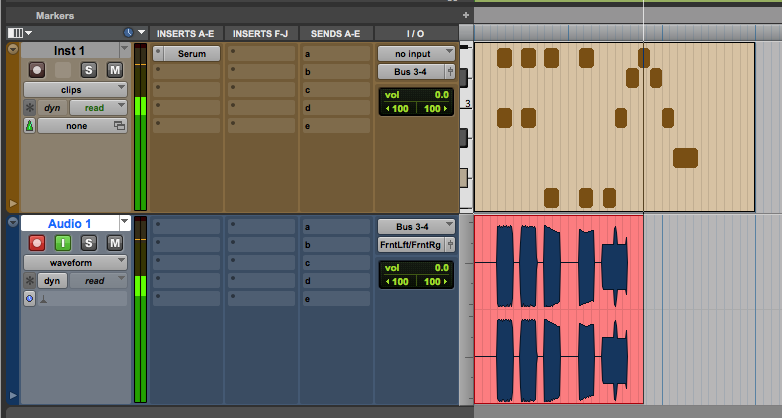
- Go to the beginning of your MIDI performance, record arm the audio track and press play. When you do this, you should see the audio of the MIDI track being printed to the audio track.
Printing MIDI is not just for sending them to be mixed, but it is also handy if you want to save some processing power too.
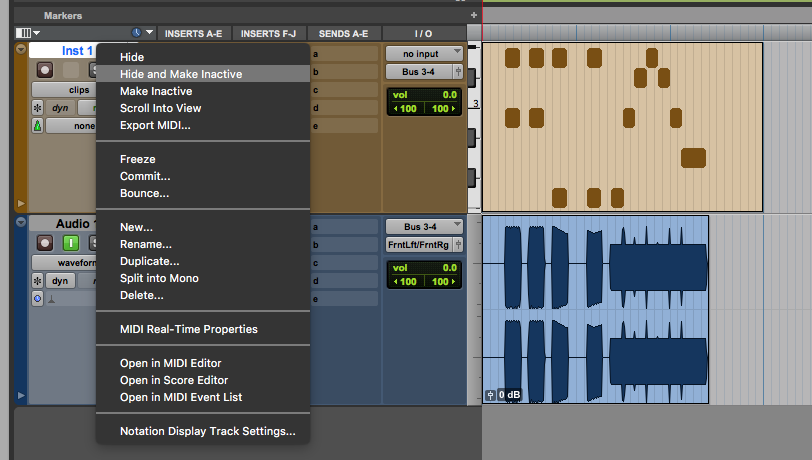
- Right-click the MIDI track and click ‘make inactive.’ After we print this to audio, the MIDI signal is hitting a dead end behind the audio track. The MIDI only hits the master buss when the audio track is armed. The instruments and plugins on that MIDI track use processing power, but not if you make them inactive.

- You can also hide the track if you want it out of your way.
You can save time when you have multiple MIDI tracks.
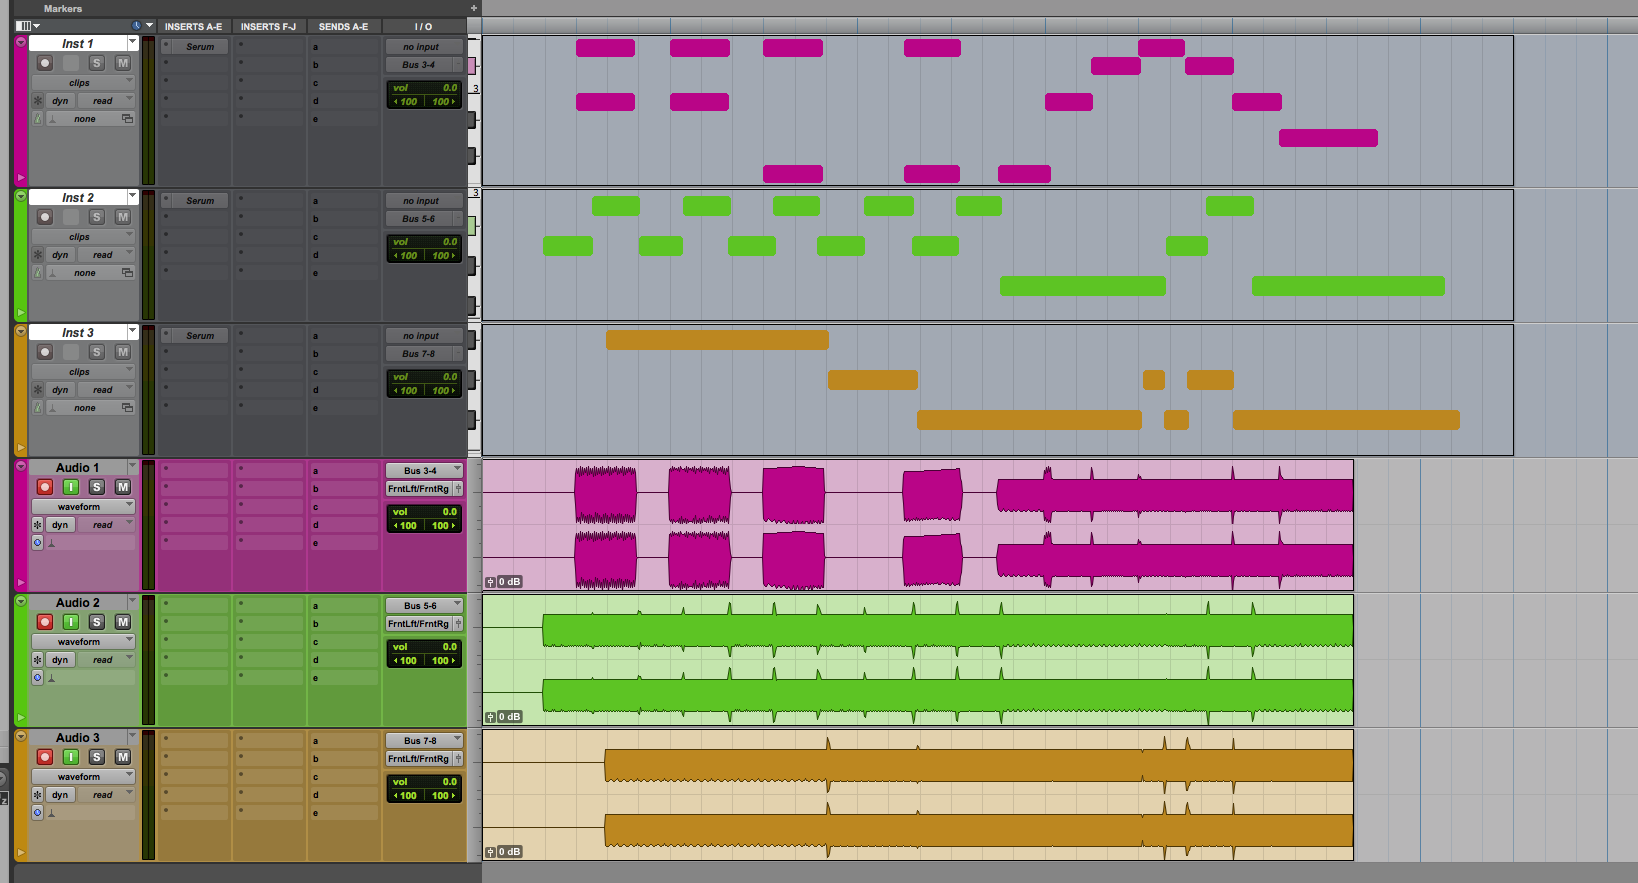
- Let’s get 3 tracks with MIDI and 3 stereo audio tracks setup in the session.
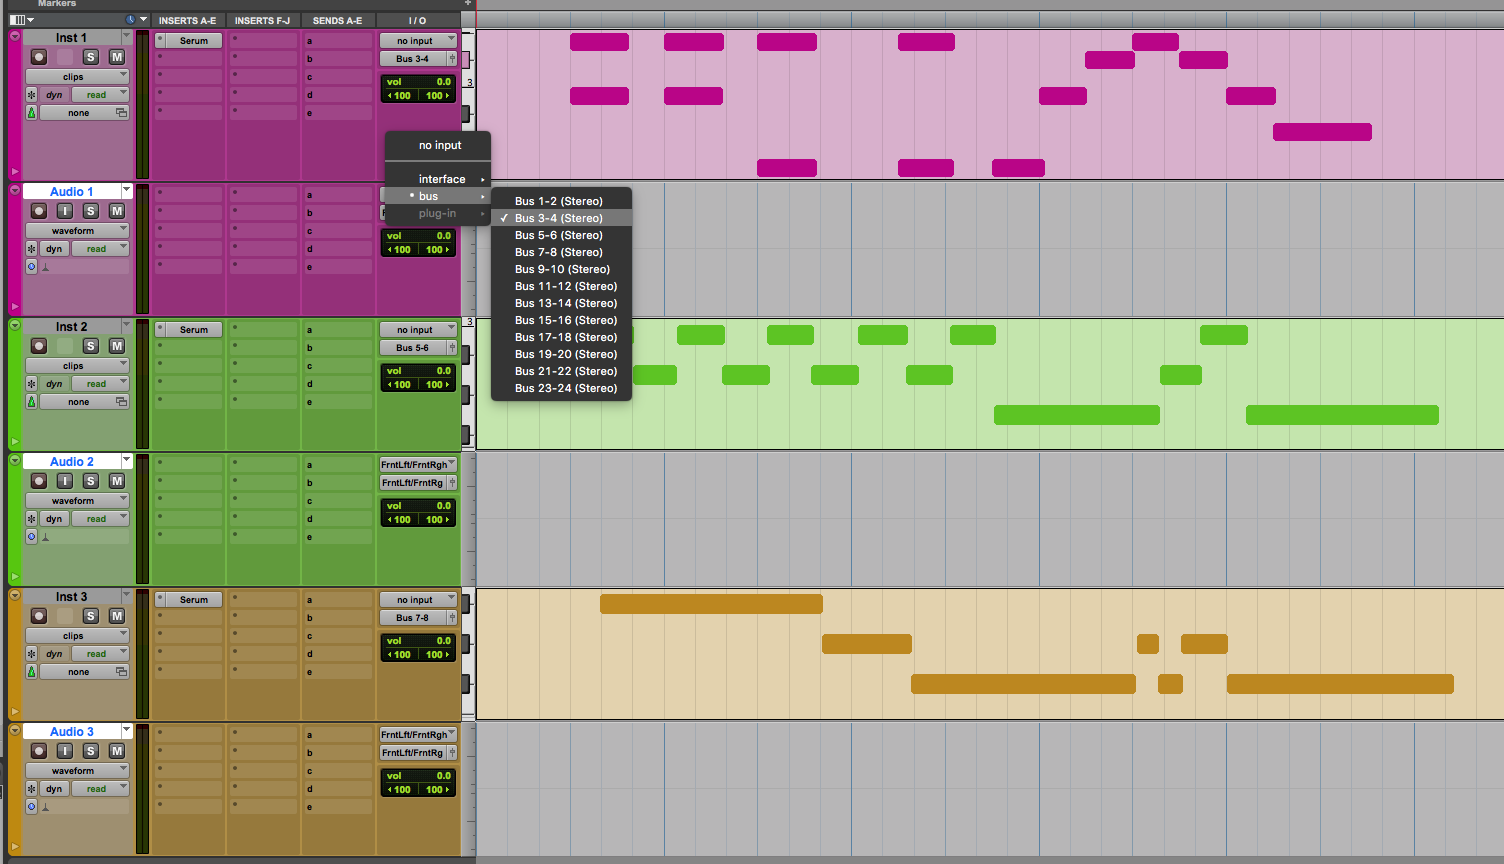
When doing multiple tracks like this, you will not be able to send them all on the same bus. If you put them all on the same bus, you will print everything to every track. We will assign the outputs of our MIDI tracks across multiple busses.
- Assign the first MIDI track to bus 3-4, the second to 5-6, and the third to 7-8. If the busses you are going to use are all consecutive, hold Shift + Option + Command while setting the first track’s output. That will consecutively assign the following selected tracks with the next output automatically. If the tracks are not right next to each other, you can still select just them. Select all the tracks you need by holding Command on your keyboard and clicking the tracks.
- Now you must do the same thing for the inputs of your three audio tracks.
- With the routing of your audio and MIDI tracks all set, you are ready to print them. Record arm all of the audio tracks and press play. Remember to make sure you hear the audio signals and they are at good levels. When you begin the recording, you will see all three tracks are printing their audio signals at the same time.
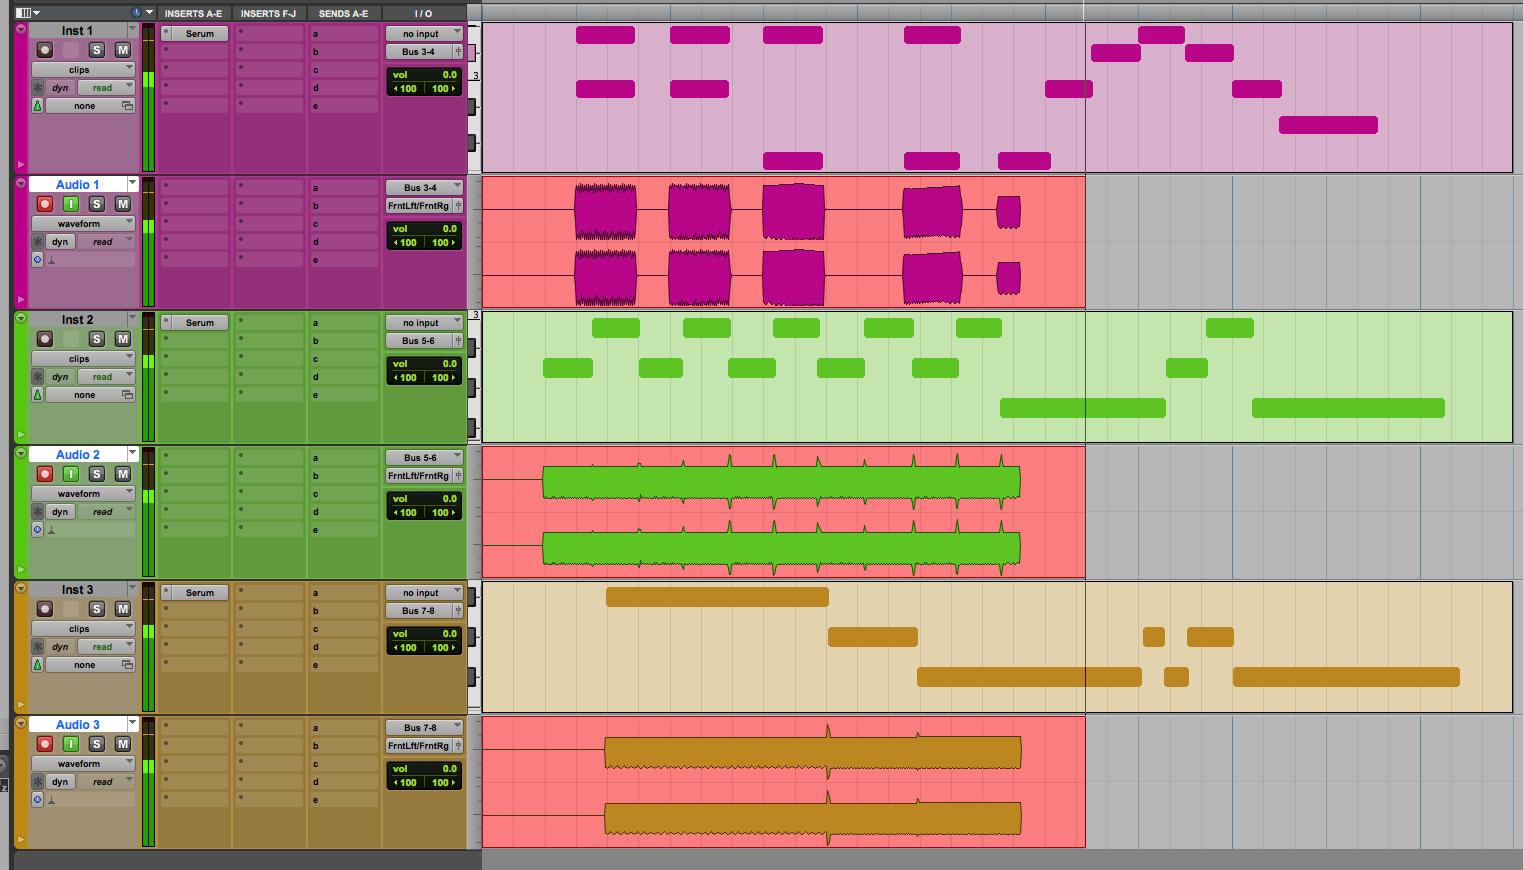
- With your three tracks printed, select the MIDI tracks and make them inactive. Remember you can hide them if you’d like them out of your way.
You’re ready to mix!
When decided whether to make an audio track for a MIDI print mono or stereo, as yourself what it would be if you have recorded that instrument. Most drums like a kick or snare should always be mono. However a grand piano that you recorded as MIDI will probably sound better being printed to stereo.
Remember that even though you are going to work with the audio files, you still have the MIDI. If the engineer, producer, or you want to change anything, activate the MIDI track in your session, re-print that one track, and send it to the engineer. If you found the tutorial useful, you might want to check out this tutorial on Auto Session Backup.